top of page

It seems like only a fortnight ago that I published this blog about getting your hand position more comfortable.


Wait a moment - it was only a fortnight ago!


Well anyway, it seemed logical that at some point in the not so distant future I ought to expand on that, so here goes!


Why?


Because - of all my pupils of all ages and standards - the one thing that seems true of every…single…one…is this tendency to make playing a piece of music way more strenuous than it needs to be!


Unnecessary finger gymnastics are already a thing as my previous blog explored, but in this blog I explore five different points that really ought to be employed when you are playing piano…and if you do, you’ll start to experience much more comfortable playing because your hands and fingers will be much better in sync!


Piano Playing Comfortable Hands


Featherlight Touch


If we were to use a simple pentascale to demonstrate, I would ask you to play and assess the dynamic of what came out. When I say dynamic, ordinarily I’d be referring to volume (is it soft, is it loud etc.) but consider now the harshness in comparison to the volume you are playing. Even when deliberately playing loudly, you don’t want it to be shrill and resonant. You shouldn’t flinch in discomfort; certainly not with a monophonic (one note at a time) passage such as a pentascale!


This is where we need to try and develop the ‘featherlight fingers’ - where we can play across all dynamics but with minimal adjustment to how we actually play. Playing music softly or loudly shouldn’t be differentiated in visible terms i.e. if you muted a video of me playing a soft then loud piece of music, you shouldn’t be able to tell the difference from my fingers alone.


To begin practising featherlight touch, always start with pieces or exercises you’re comfortable with and play them by allowing the fingers to fall onto the keys with just enough pressure to actually play them. If this sounds obvious, check with yourself that you’re already doing this! If so - fabulous! If not, rethink your technique slightly. You don’t want to be pressing keys down with stiff fingers because this will not only sound static and potentially uneven, but it will be uncomfortable for you to play for long, may result in wrong notes (tension in one finger can lead to another finger unwittingly following suit) - not to mention pieces that span a lot of keyboard will be more of a challenge because you won’t be developing enough fluidity to move your hand or wrist to reach higher or lower registers / notes.


If you struggle, don’t get into the habit of repeating over and over because you’ll just start to incorporate that frustration back into your playing. Make sure your touch is gentle and you are pleased with the sound coming out (both dynamically speaking and in terms of evenness) and then experiment with different dynamics but without stiffening those fingers up again.


Press and Release Tension When Playing Piano Keys


When you play a note on the piano, the second you hit it the job is done. If you keep the note held down, that note is going to sound how it’s going to sound. Everything you control about it is purely from the way you strike the key in the first instance: dynamic, tone, hitting the correct note etc.


The piano (and other percussive instruments) is a bit of an oddity in this regard. Most stringed instruments (especially bowed), all woodwinds, brass and singing (obviously!) all maintain a certain amount of control. With a violin, you can develop tremolo on a long note after you’ve sounded the note, as you can with a flute, not to mention that with this or a brass instrument such as a trumpet you have to always be in control of that note for as long as you need it to sound i.e. be giving even breath for its duration.


Yet with piano, the beginner’s curse is that they will strike the key with a certain tension such as in the point above…and then keep that tension going throughout the duration of that key being depressed.


At the time of writing this (2024) acoustic pianos have not developed into the realm of tremolos, vibratos and other such weird and wonderful effects (what an extraordinary day that will be!)…so we can safely assume that once you’ve hit the key, the only thing you have to do is keep the note held down if you want it to keep sounding.


You do not have to be pushing hard into it!


You do not have to shake your hand around once it is played!


Being a pianist - or any musician - requires quite enough well placed tension and hard work without you unnecessarily adding to your list of trauma by creating effort where there needn't be!


Experiment with Fingers


I’m very big at not feeling the need to use fingers as written on a score as verbatim, however they do provide the 99.9% favourite way of performing a piece.


Why?


Usually because it’s the most comfortable or most logical, depending on how the fingers are expected to move throughout the piece.


Yet as much as I like to enforce the idea, some of my pupils like to just bring their own fingers into the game right from the off!


And even when performing something that’s not scored out, it’s worth experimenting with the fingers you are using.


Always…think…logically!


My golden rule is that a major third (four semitones) is the biggest interval you should play between any neighbouring fingers. For example, if you are playing C - E, it is fine to use fingers 3 and 2 in the left hand / 2 and 3 in the right hand, but if you shift that from C - F…don’t even try! 3 and 1 in the left hand or 1 and 3 in the right hand would work much better!


The purpose of experimenting with this is to find combinations that work best for you, but even my golden rule above isn’t immune to being broken.


For example, I’d hesitate using fingers 5 and 4 in the left hand to play a major third under any circumstance.


Think about the spacing of a chord or group of notes you are playing (if you are playing a short burst of melody, consider playing all or as many of the notes in that bar / passage at the same time in one hand to create a…er… ‘chord’, for want of a better term!) and then relate it to the shape of your hand. Consider where the bigger intervals are and which ones would be most logical for you to leave gaps between and how big:


Piano Playing Comfortable Hands Fur Elise
The finger numbers are written here anyway, but let's assume they're not. Read on...


For example: in the above bar from Beethoven’s ‘Für Elise’, the right hands notes are C - E - A - B.


C - E is a major third and, as mentioned above, I’m more than happy to play these with neighbouring fingers - especially because A and B are a little higher above them! So I’ll use 1 and 2 in the right hand.


E - A is a perfect fourth, so there’s no way I’m going to try and stretch from finger 2 on the E to finger 3 on the A…as I’ve seen people do! Instead I’m going to use finger 4 on the A, leaving a logical gap between fingers across that perfect fourth, and finger 5 will sit nicely on the B.


Of course, if your hands don’t stretch as freakishly far as mine (I believe I am, in fact, not of Earth…) then you will need to incorporate some wrist action to get the most fluid effect. But that is the next point…after this following point…


Patience and read on…


Avoid Scrunching!


To be fair, this point kind of follows on from the previous one regarding experimenting with fingers, but it is in its own right a reminder to familiarise yourself with the most basic distances between notes i.e. tones and semitones.


I know you know what they are by now, but get used to them from a physical distance point of view!


Pentascales (scales full stop, in fact) are fabulous for this because they are formed wholly of these intervals (major and minor seconds), but sometimes when we practise a piece of music - especially when it’s not in a key we’re particularly familiar with - we forget this and scrunch our fingers together.


Maybe it’s a defence mechanism - a completely illogical one like ducking your head when an eagle flies over at one of those demonstrations or closing your bedroom window at night because you heard a noise that sounded like a burglar was…already downstairs - or maybe it’s just the lack of certainty that means you try and pull everything close so it can’t stray.


Use scales and pentascales to your advantage here and keep practising and familiarising yourself with how consecutive notes feel so that you can easily slot them in to a piece of music when you need to.


Use the Wrists to Encourage Comfortable Hands when Playing Piano


Ah, finally, the aforementioned point about the wrist that we’ve all waited for.


Actually, I’ve written a whole blog dedicated to wrist action and exercises so I’m not going to delve too deeply into it, but ask you now to try and visualise what it actually looks like and how it connects to your hand.


Following years of medical training that I…never had…I can confirm, thanks to a quick Google search (the same Google that gave me a one week prognosis because I had a spot on my nose) that the wrist is a condyloid joint, and now that you know how well qualified I am, you can believe me when I say that that’s like a ball and socket joint but the deluxe model! (Perhaps somebody with actual medical knowledge can comment on this post an explain it in much better detail!)


Point is…it’s incredibly flexible, yet I’m continually seeing people trying to play with flat hands at all times and this will only take you so far; a few basic pieces and exercises that don’t change position much. The wrist is needed to be able to make jumps, play fluidly and more - so don’t neglect it! This is one of the crucial things to help your hands be more comfortable when playing piano, but work through all of the above points and your technique will improve!


For a video recap, see below. And subscribe to me on YouTube for more videos like that, short little tutorials and sometimes videos of me showing off!


Jack Mitchell Smith is a piano teacher based in Macclesfield, Cheshire. Click here to find out more.


Weekly blogs are posted that may help you with your musical or piano journey. Click here to sign up to the mailing list so you never miss a post!


Piano Practice


We’ve all been there - a good 30 minutes, 1 hour, full day perhaps, of sitting down at the piano and practising only to go back the next day and be none…the…wiser. But how can this be? When we literally spend so much time concentrating on and thinking about what we are doing, why can’t we always just pick up from where we left off? In fact, why do we sometimes fall backwards and do considerably worse than where we left off? Or even from where we started?


As a very black and white rule, I tell pupils to average roughly 30 minutes a day for practice; that’s a few minutes of warming up then scales and technicals, a good chunk of focusing on their pieces (in particular on problem areas) and then rehearsing performance style at the end (e.g. playing what they have learnt but playing it as more a performance than a rigidly metronomical interpretation). Obviously the timeframe can extend or shorten for different people, but the format is the same and if all areas are addressed correctly - nothing can go wrong!


However, things can go wrong because addressing each area correctly is difficult, and it’s a difficulty that reaches far past what you may refer to as the ‘cop-out’ reasons (“it’s boring to play slowly”, “I can play it well enough” etc.) and actually roots itself in being so difficult because our brains are all wired so spectacularly differently. Not only that, our brains develop and change as our skills develop; not just in piano - but in anything! So for me to say that this way of practising your scales will work and this way will not work is way too generalised!


And that brings me to the purpose of this short but hopefully very informative blog post: how to consider different approaches to practising the same thing.


Before I go on, make sure that a practise session covers a whole load of things. Whilst it’s fine to prioritise scales and give them longer for one session if they’re your pitfall against your pieces, don’t neglect the pieces! Variety is the spice of…the practice session!


Anyway, a couple of tips:…


Intense Repetition vs. Paused Piano Practice


Let’s say that you’re struggling with the B♭ minor scale (a sentiment close to my heart as it’s one of my least favourites too!).


There is without a shadow of a doubt one - and only one - type of learner who I’ve ever experienced when it comes to practising piano: the ‘driller’.


They will play it. Get it wrong. Do it again. Play it. Get it wrong. Do it again. Play it. Get it wrong…etc. etc. - eventuallyyyyyyy they may actually play it correctly but by this point it’s fluke, otherwise it’s not even a part of that same practise session.


Try out this fun little exercise. Choose a random word that has no relevance. Something everyday such as: concrete.


Normal word, right?


Now say it ten times.


And ten more.


How does it sound now?


Little bit odd?


Just to add to the audible weirdness, read the word a few times and see how odd it starts to look too:


Concrete, concrete, concrete, concrete, concrete.


If you wish to take the experiment even further, write it out a few times. You may even start to stumble over the spelling because it’s just lost all meaning and relevance. The word in passing is perfectly viable and usable and you wouldn’t ordinarily hesitate on the word or the spelling, but now we’ve overexposed it. You’ve ‘overpractised’.


So, as an alternative, try this when practising your dreaded B♭ minor scale:


Play it slowly. Observe any issues.


Now wait 30 seconds.


Play it slowly again, focusing on correcting the issue. Observe if it happens again, or if any others happen.


Wait 30 seconds.


Repeat this until your allocated timeframe for scales is up - 5 minutes, for example.


Will it be perfect by the end of 5 minutes?


…NO!


But you’ll have been much more focused on it and thinking about it more than just relying on muscle memory, thus when you go back to it - whether that be a day or a week later (please try not to leave it a week though!) you’ll be able to recall it much more easily.


Not only that, you won’t be tired from 5 minutes of intensive finger workout and stressed from not getting it right!


Same principle goes for problem areas in pieces or finger exercises - memory is a powerful tool that is underestimated in piano. Just make sure you concentrate on what you’re playing and try not to practise to the point of only using muscle memory.


Practical Practice vs. Music Theory


Practical Practice refers to physically playing the instrument, whereas music theory refers to what makes music as we recognise it work: the rules etc., including how to interpret notation.


A lot of my pupils are very excited by theory and that’s fantastic, but it’s happened a few times now where they have been so engrossed in the theory that they forget to play! Or, indeed, those who don’t necessarily enjoy the theory as such forget to remind themselves of certain basics because for them, piano is all about sitting at the instrument and only playing the keys.


The reality is that it is like a circle; practising on the instrument and getting yourself used to note position, key signatures, rhythms and harmonies / intervals etc. can naturally improve your theory, whilst studying theory can really put you in good stead when it comes time to sit back at the keyboard.


Not all piano practice has to be physically sat at the keyboard! Next time you are practising a piece - especially one you’re quite new too - try sitting down with a pencil and assessing things first. Draw in lines to dictate rhythms if rhythm isn’t your strong point, identify bigger intervals or extract rhythms from a piece that you can work out first. Putting theory into context is a huge part of music and is one that is often missed out by those who just read up on it. Do this before you try and play the piece and you’ve now ticked off both halves of this point: practical piano practice and learning music theory!


Jack Mitchell Smith is a piano teacher based in Macclesfield, Cheshire. Click here to find out more.


Weekly blogs are posted that may help you with your musical or piano journey. Click here to sign up to the mailing list so you never miss a post!


With so many method books out there, it’s exciting to see how different learners can take up skills on the instrument in different ways. Some people learn the white keys first whereas others get used to the black keys. Some learn more theory and then put that into practice, whereas others learn more practical music and then dissect the music. Yet the practical side of playing piano quite often boils down to a few simple rules. And one such rule is:


The hand needs to be in a comfortable position.


With such a plethora of workbooks for learning out there, it is interesting to see that so many of them build the learner up from a simple starting point. This usually involves ‘C Position’, which is where the right hand lays the thumb on middle C, finger 2 on D, finger 3 on E etc. - and the left hand does the same idea but one octave lower and, of course, fingers reversed (finger 5 on C, finger 4 on D etc.).


But…there is one fundamental problem with this technique!


YES - it gets us used to playing at least something from the off.


NO - it doesn’t truly reflect the skills required going forward.


And one of the main things that I find from this is that the hand can struggle to adjust itself to different positions because of how used it gets to C position.


Consider this: C position is all white keys.


If you wish to play a scale of C major - whether that be the full scale or just a pentascale - you can easily do this by keeping your hand in a position that graces toward the edges of the keys. You don’t need those black notes getting in the way!


However, when we finally do introduce black notes - even if only one (for example, an F if we play a piece in the key of G major) - it can lead to all sorts of weird and wonderful acrobatics from the hand because we assume that we need to just grace the edges of the keys for the entire duration - like we do when it’s all on white keys! Thus, when we come to a black note, we literally have to stretch or jump or twist our wrist in order to reach it!


And is this the correct way to play piano?


I’ll let you decide the answer…


And for those who can’t make up their minds…


The correct answer is…


NO!


So let’s investigate just a couple of ways in which the hand position can be developed so they become a much more settled part of our body whilst playing piano:


The Coin on the Back of the Hand Method


This is an oldie but a goldie, and one that tends to be employed right from the off by teachers that wish to use it (I don’t personally use it by default, but if I were to ever come across an extreme example of bad hand position I might try it).


Simple execution: Place a coin on the back of your hand. Play. Keep the coin on the back of your hand.


piano hand position


Note that the coin will probably slide off when you take your hands off the keys, so if you are changing hand position or jumping off keys - particularly with a little vigour - then you can be forgiven for dropping it. But in general, passages of music that you play note after note with your hand should be done so in a way that allows the coin to stay on.


Moreover, you should feel it being still. If you feel it sliding around, you’ll know something’s amiss. And if you feel it start to slide off, you will hopefully be able to pinpoint from that the exact moment that your hand position is losing its discipline.


Improving Hand Position on Piano with Chords


Familiarity of the shape of chords is a good way to practise getting your hand position much stronger, and taking it ascending chromatically (up one semitone at a time) is better still as this will require constant readjustment.


When beginners start to shift between chords, they will often lock their wrists into a set position away from the keyboard - almost like they’ve been shackled from a wall behind them and can only get so close to the piano. Therefore, any exercise in chord shifting becomes an exercise in finger twisting. For example, C major stays at this safe distance away from the piano, but then when E major is attempted, the hand doesn’t move, the E and the B are pressed in about the same place as these are the white keys, yet the third finger attempts to stretch out to play that G♯ rather than just…moving the hand forward slightly!


The reason that chromatic ascension of triad chords is such a good tool to practise with is because it is continuous readjustment of hand position.


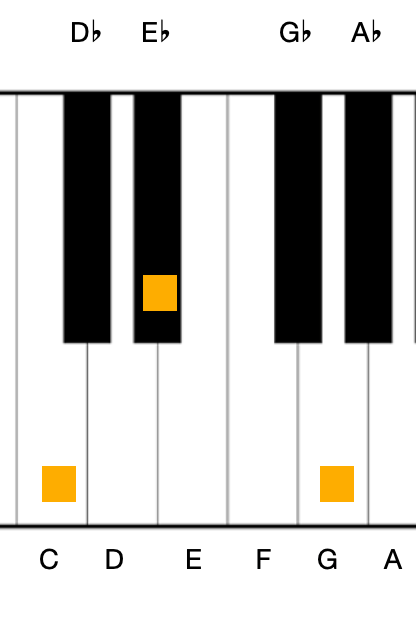
If you need help identifying all the chords, read my blog on how to find them here . Even if you only find four or five neighbouring chords, that’s a great start to help you out. But if you do manage all twelve, try playing the major triads of C, C♯, D, D♯, E, F, F♯, G, G♯, A, A♯, B - or, indeed, their minor alternatives.


Don’t race through them.


Take a moment to appreciate the slight adjustments that you are making with your hand. You’re not aiming to just graze the keys by fluke - it has to be a definite depression. Remember the curvature of your fingers at all times.


Twisting


No pain, no gain, right?


Wrong!


You shouldn’t be feeling excruciating pain from this exercise, but it’s important to recognise it and adjust as necessary. It’s also important to recognise when this is just discomfort from a new exercise that you should work through. This usually feels more like fatigue than discomfort or pain. If you’re getting sharp pains, something isn't right and the most likely cause is…twisting!


Using your right hand as an example, the further up the keyboard you get the more lopsided your chords will get. In white note chords such as C, F and G it’s easy to keep the fingers relatively even in length, but as you progress up you will find exceptions. For example, B major has two black notes in fingers 3 and 5, leaving the thumb on a white note which causes a bit of a twist. Work with it and make subtle adjustments to make sure that you are both playing the chord confidently and not causing yourself unnecessary discomfort.


Height


Remember also that height plays a part! Just look at the keyboard and notice that the black keys protrude up by at least 1cm, so to not add a slight bit more elevation in your hand position would be illogical.


Similarly, don’t think you can get around this constant adjustment by always playing with exaggeratedly raised hands. As I always say - pianists are always looking for the easy option, and I can assure you that playing with this added strain is not the easy option. You add a bit more lift when you need to work around the black notes, which has the advantage of naturally curving the fingers round a touch more. In doing so, it increases their precision in hitting the black notes. Let’s not forget they have much less surface area and also - being high - can be ‘slipped off’ if not struck correctly, so do yourself the favour of giving yourself every possible chance of actually playing them!


Incorporating Technique into Musical Passages


When your hand position is feeling much more confident, you can incorporate this into your performance of musical passages too. Before you delve straight into a piece of music you are learning or wish to learn, try it with some of your simple exercises such as scales.


Try a simple 1 or 2 black note scale (G major, D major, F major, B major) and work in your understanding of when your hands needs to push forward ever so slightly and then pull back as well as the moments in which you could advantage the fluidity by lifting your hand (and arm if needed) to accommodate for those black notes.


Don’t forget that we are never seeking exaggerated movements and we certainly aren’t looking for sharp movements. Everything that we seek to do as pianists should be with a fluid movement. A rise and fall like sweeping hills. Not up and down like a zigzag! Try to visualise the movements of your hand (and arm) like waves in the sea as they rise up and down and for the forward and back motion ensure you avoid sharp movements as these will send shock waves down your arm and fatigue and hurt, not to mention affect your playing.


Try it yourself, and for a video demonstration of all I have covered check out below:


Make sure you subscribe to my YouTube channel to never miss a video!


Jack Mitchell Smith is a piano teacher based in Macclesfield, Cheshire. Click here to find out more.


Weekly blogs are posted that may help you with your musical or piano journey. Click here to sign up to the mailing list so you never miss a post!

bottom of page